Schema Builder
The following is a sample from a previous documentation project for a backend machine learning service. Names and identifying content have been changed.
A schema is used to describe your unique business data, modelling your company’s chosen entities as Objects. These objects include the default User as well as any other you may need. For example, Post, Book, Order, or Hotel Room.
Objects in [company name] can be described in greater detail using Attributes and Labels. The way a user may interact with other users or objects is described using Interactions.
In order to start the learning process, you’ll need to create and publish your first Schema. Once a version is published, you are able to make further changes, which are saved for you in a draft until you are ready to Publish again.
This page covers how to add schema elements using the Schema Builder. Learn more about the elements of a schema here.
The Schema Builder
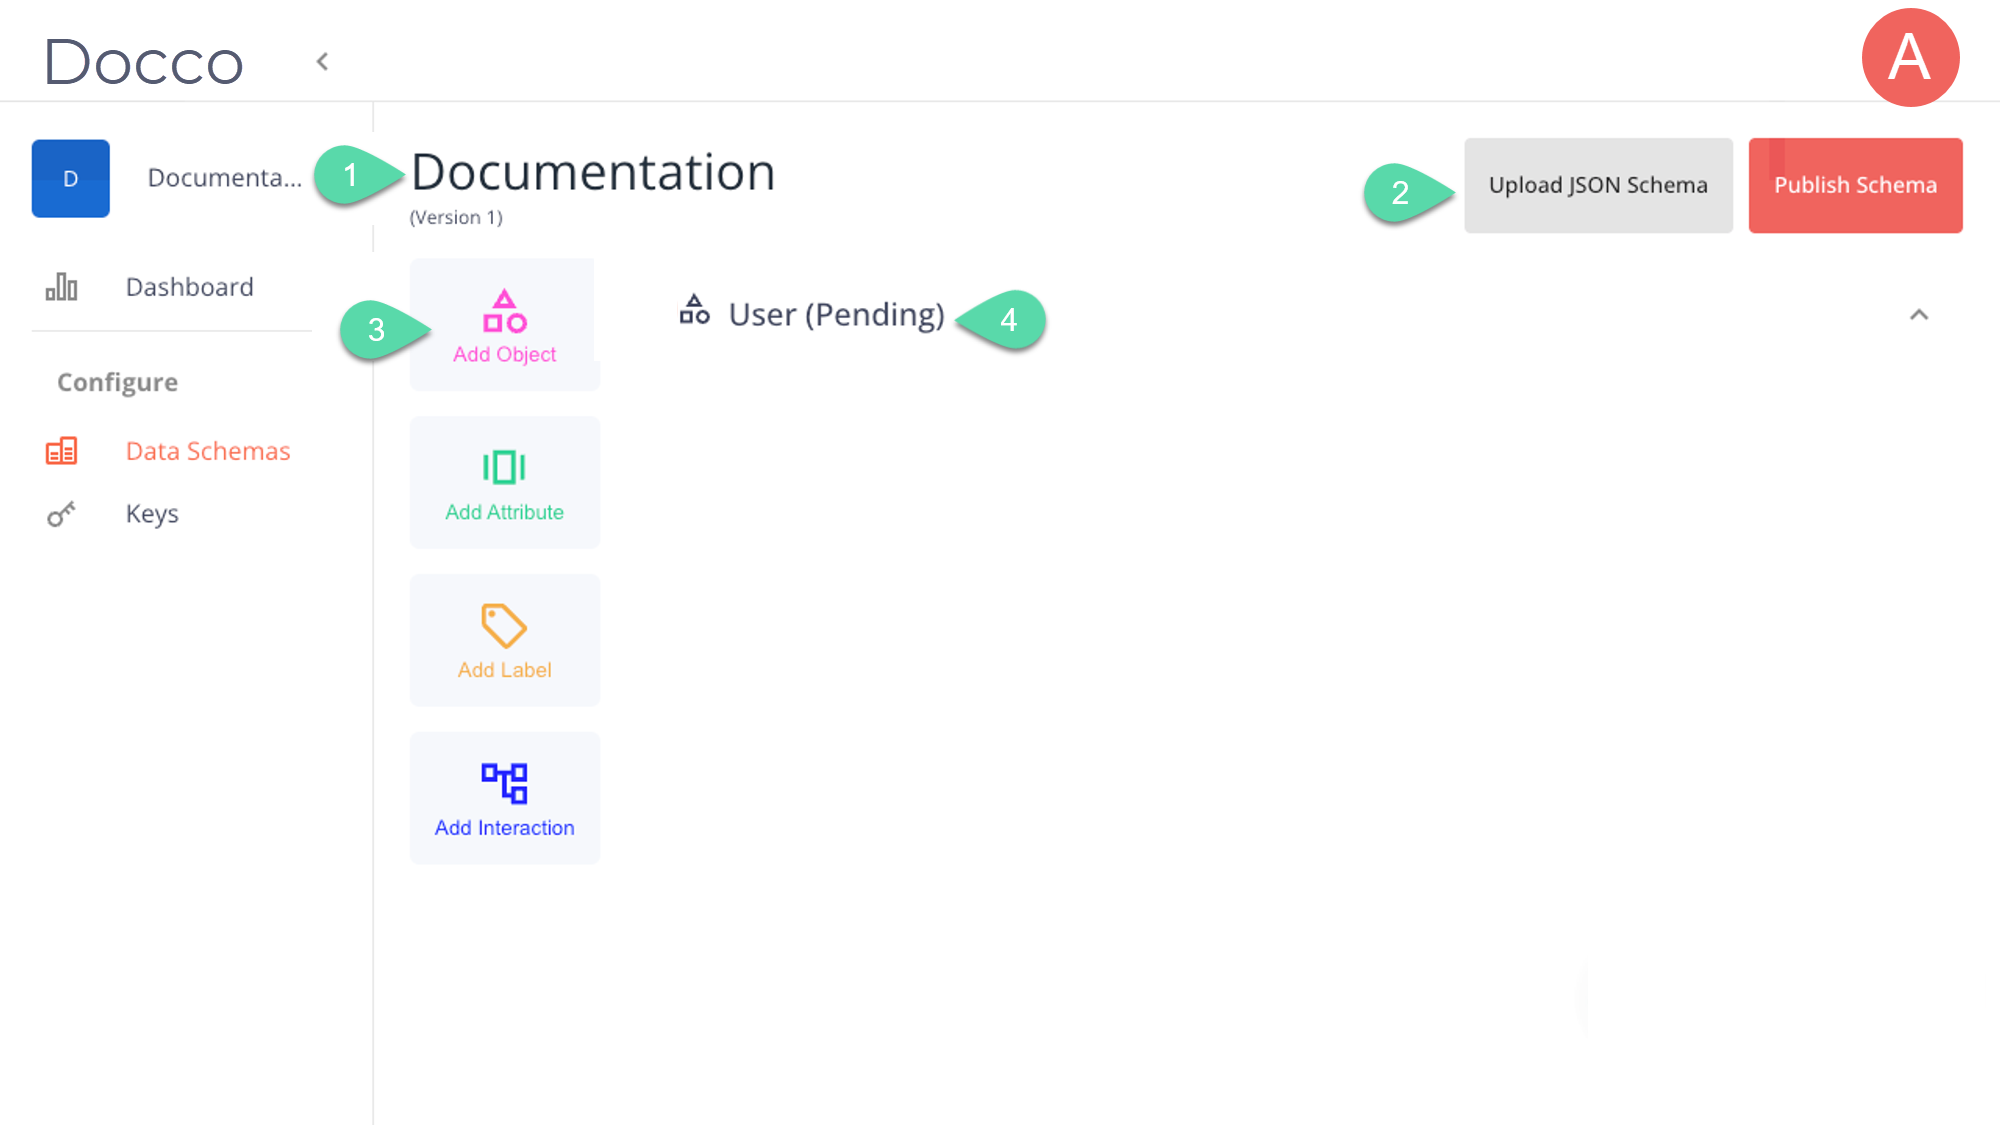
| Label # | Name | Description |
|---|---|---|
| 1 | Schema Name and Version | Here you will find the current name and version id of the schema in your team. Schema versions are integer-based, beginning with version 1 |
| 2 | Version Toolbar | The Schema Version includes buttons for uploading a JSON schema (Advanced) and for publishing a new schema for Begin AI to learn from. |
| 3 | Building Toolbar | The core activities of building a schema are included here. Using these simple building blocks, you will be able to describe and customize your entities. |
| 4 | User Object (Default) | The default object in any new team is a User object. This can be appended to include your organization’s data points as needed, but cannot be removed or renamed. |
Adding a New Object
To add a new object:
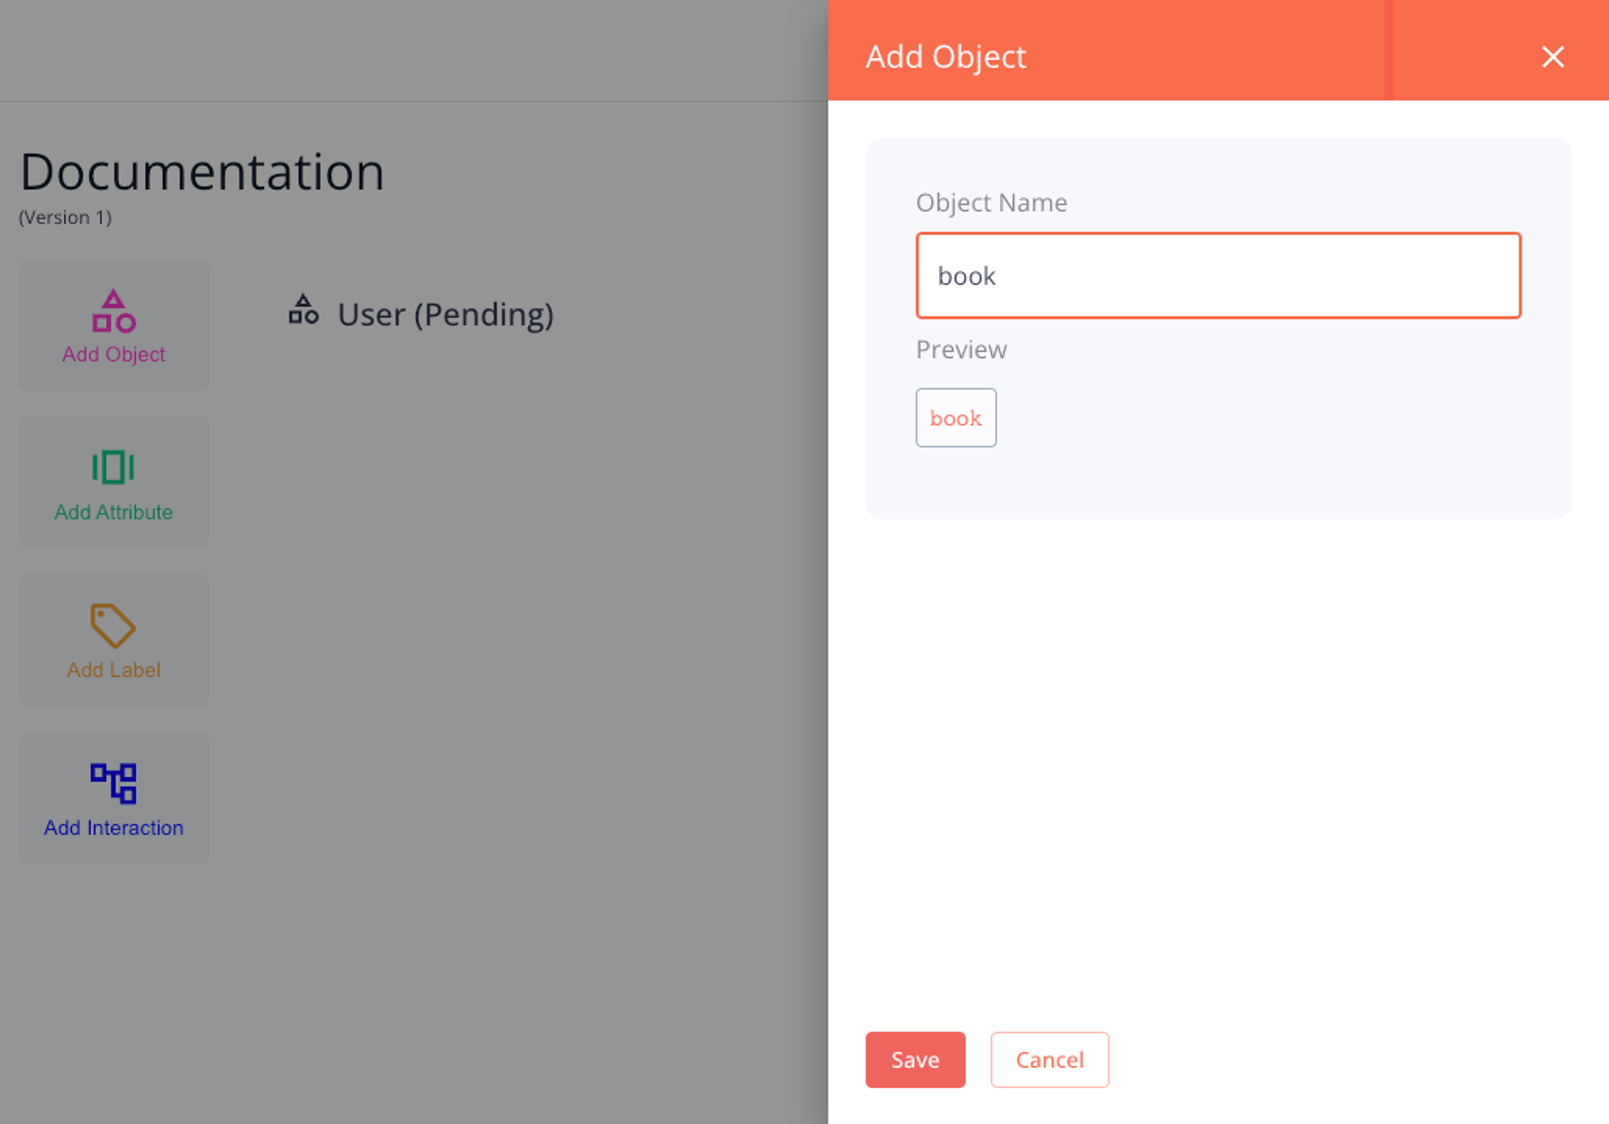
- Select Add Object to expand the associated menu.
- Enter the name.
- Select save.
The name is automatically formatted to snake_case format. You can preview the object name in the preview below the name form.
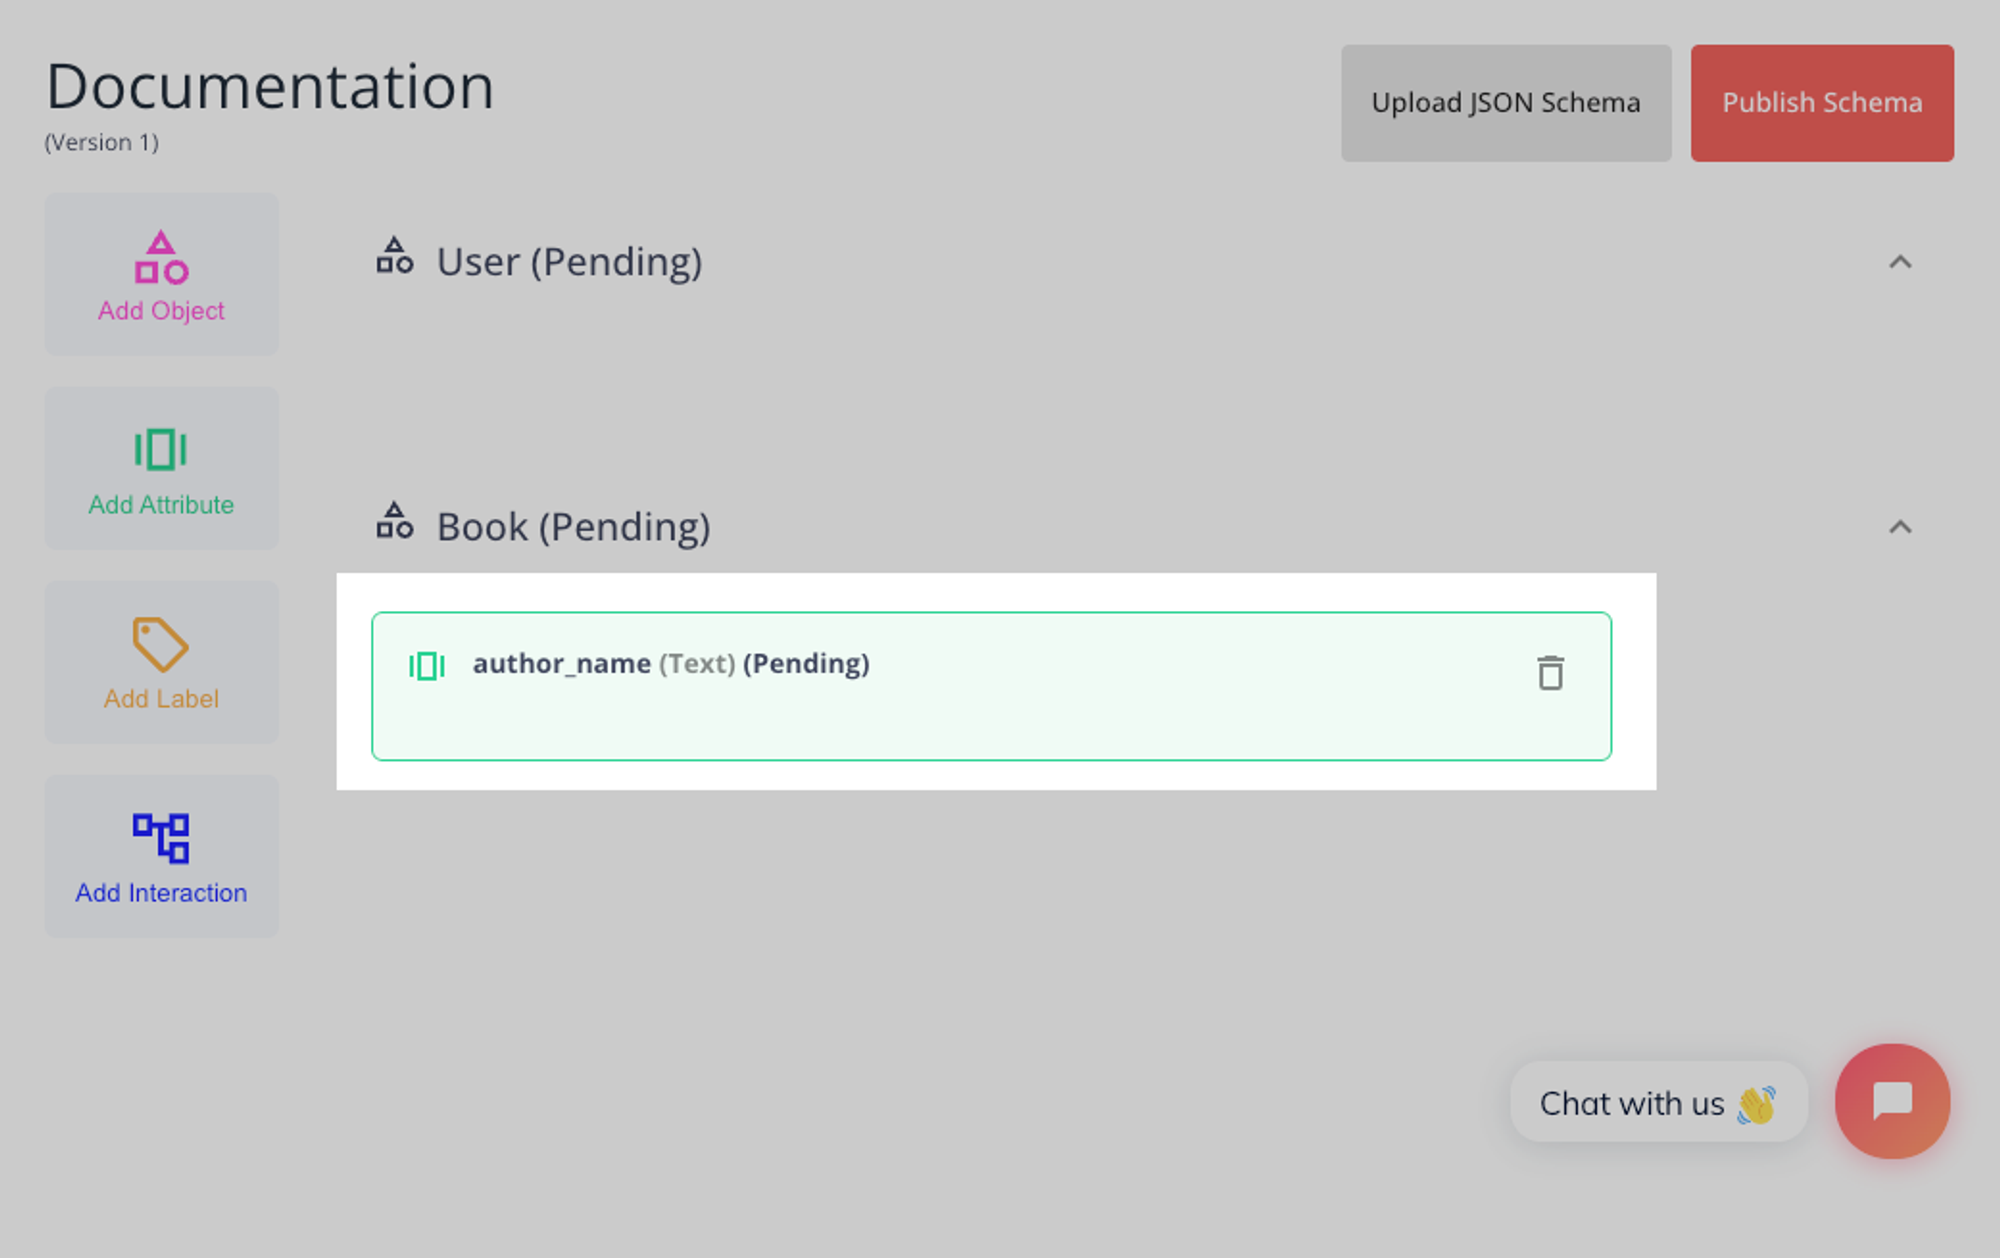
Adding an Object Attribute
To add an object attribute:
- Select Add Attribute to expand the associated menu.
- Select the object you would like to add an attribute to from the object dropdown menu.
- Name the attribute in teh Attribute Name field. It will automatically convert to
snake_casein the preview below the field. - Select the attribute type from the Type dropdown menu.
- Select Save. Once saved, the attribute will be added to the draft schema.
Adding an Object Label
To add an object label:
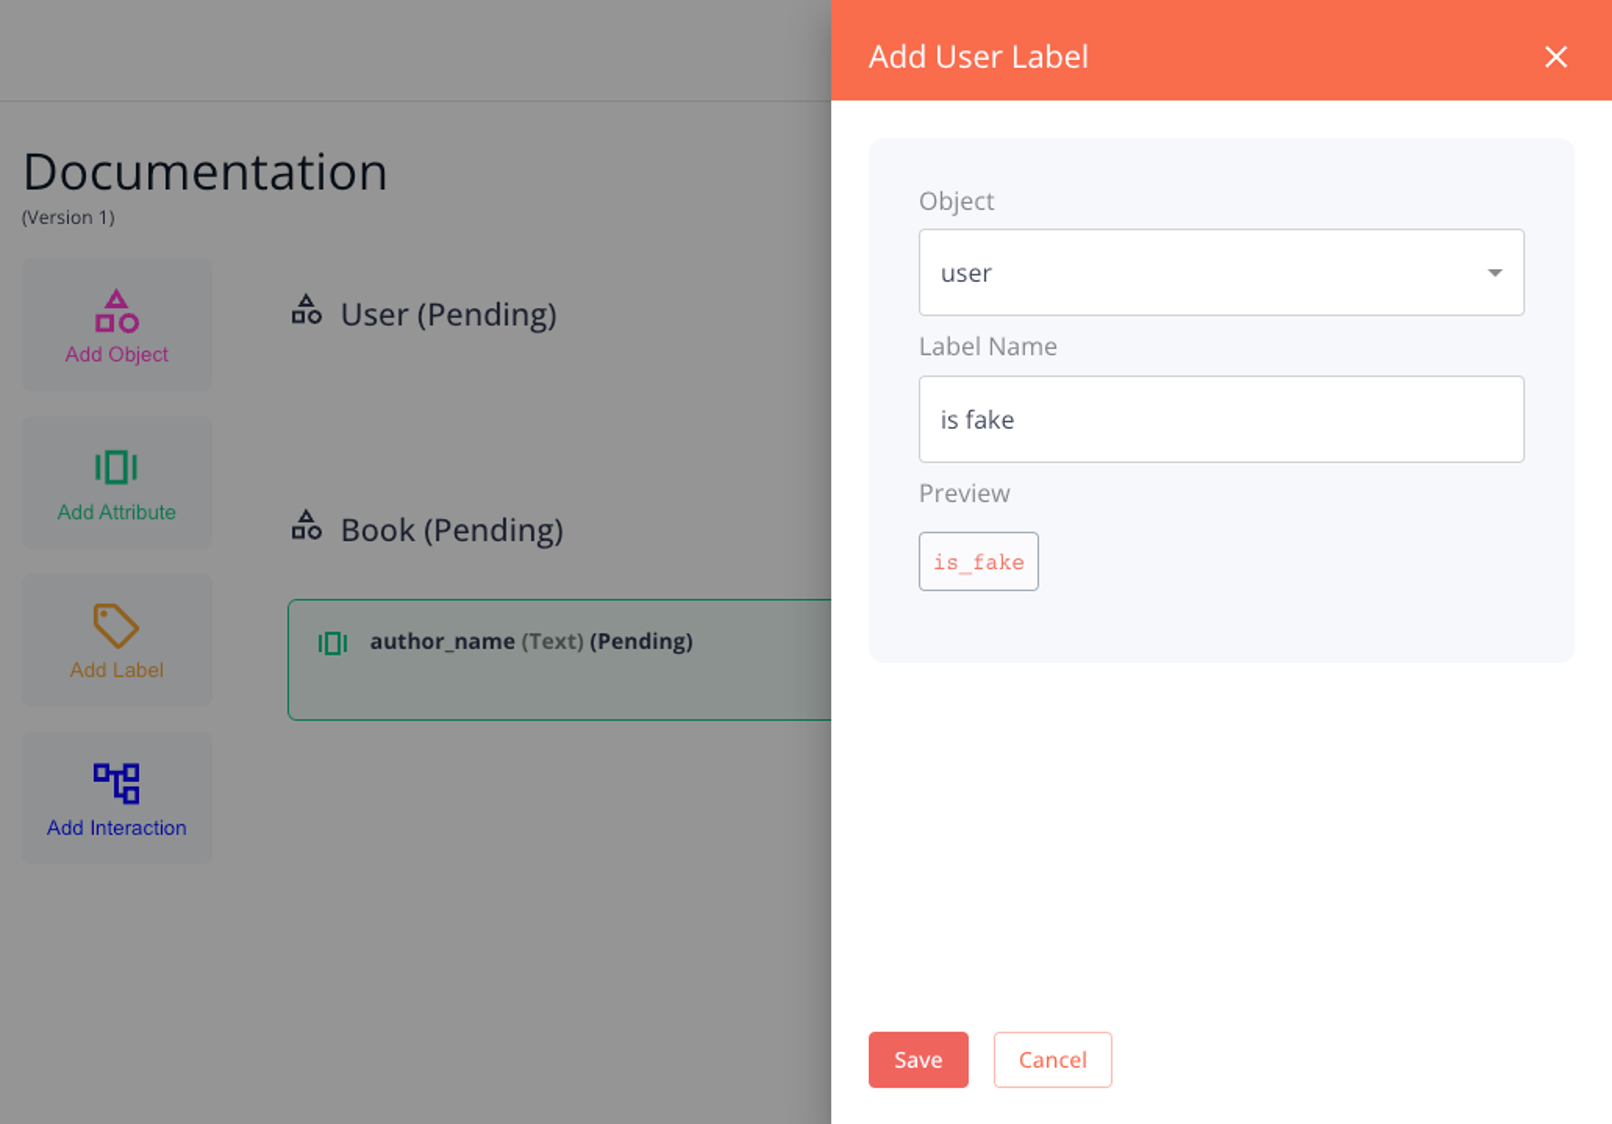
- Select Add Label. The corresponding menu will expand.
- Select the object to label from the Object dropdown menu.
- Enter the label name in the Label Name field. The preview below the field will show the output in
snake_case. - Select Save.
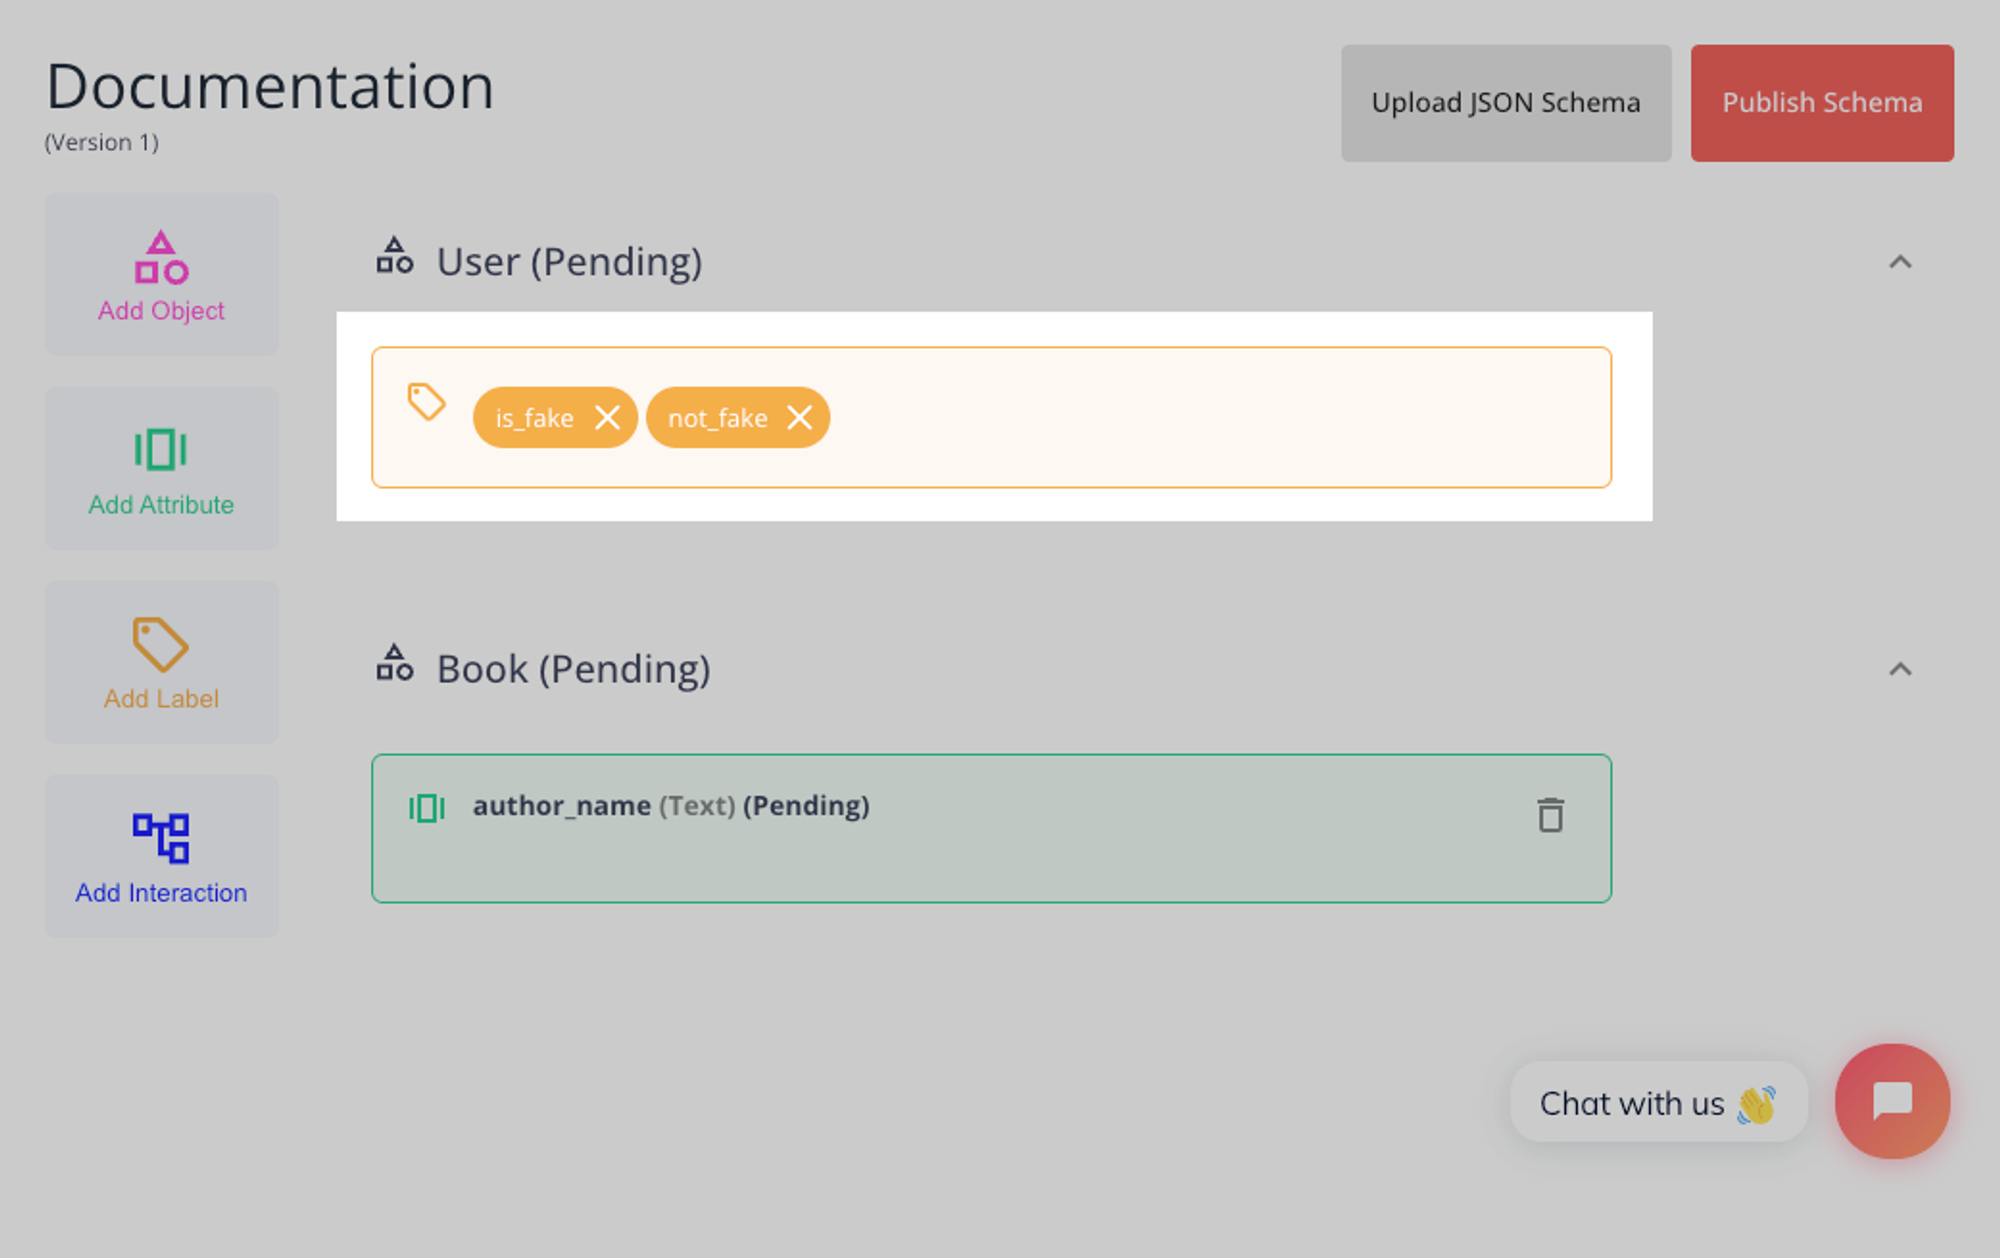
Once created, the new label will be shown below the associated object.
Adding an Object Interaction
To add an interaction:
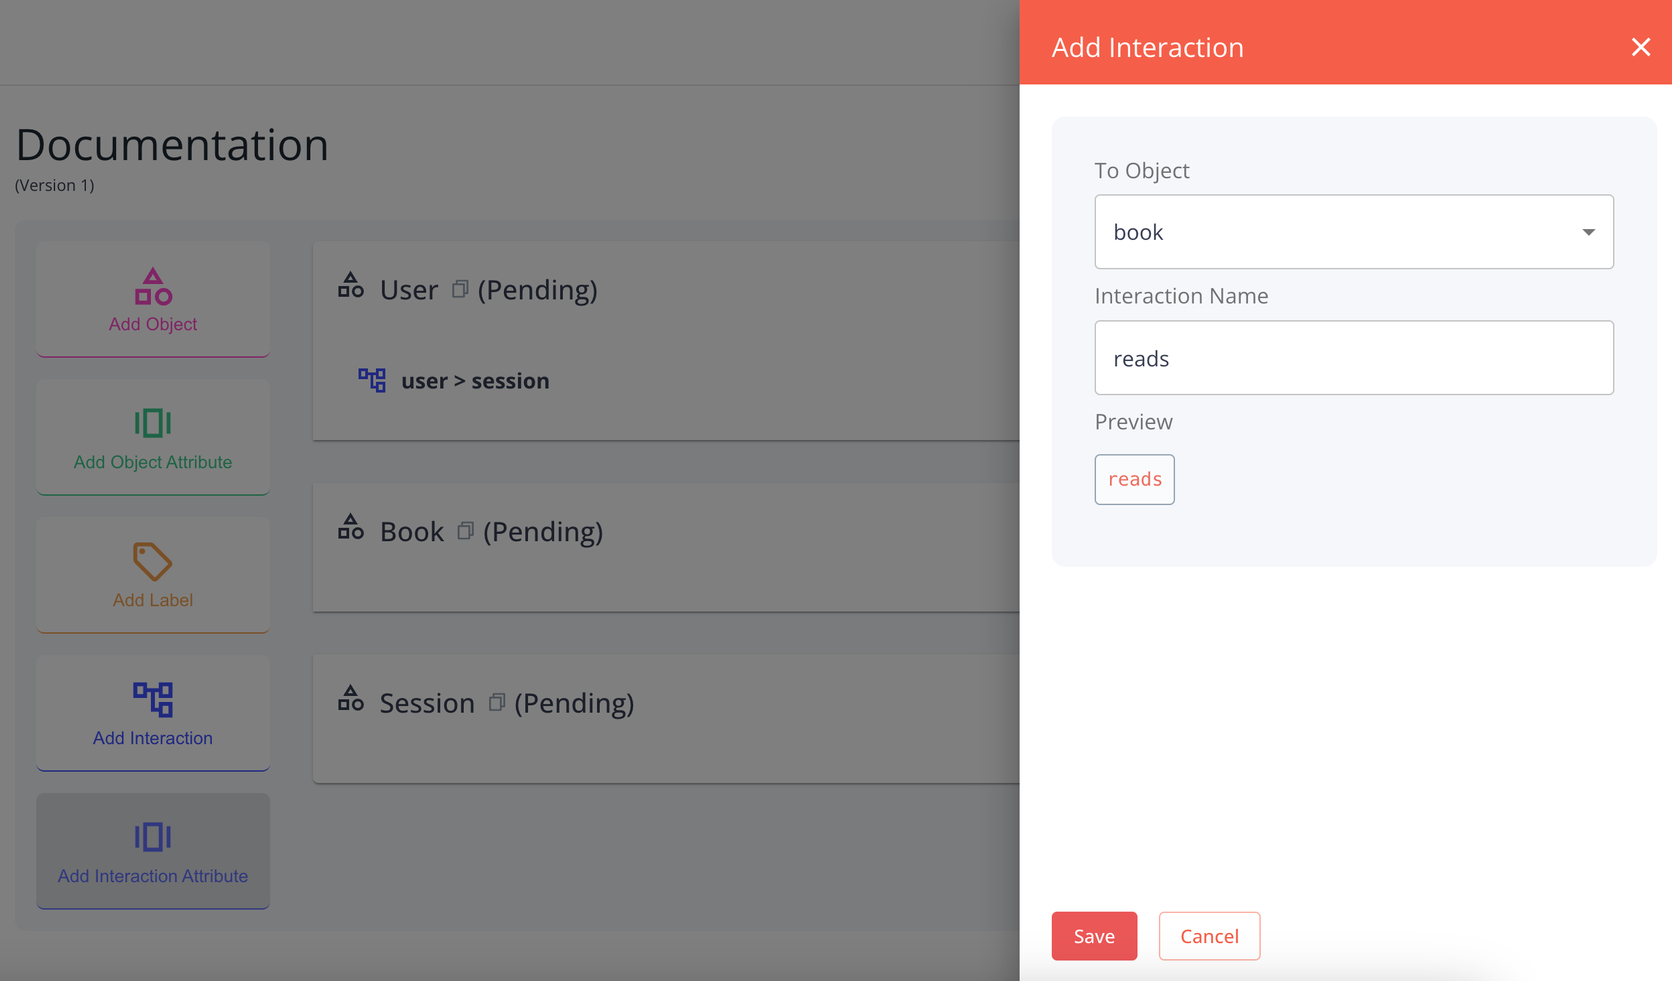
- Select Add Interaction. The corresponding menu will expand.
- Select the object you would like to add an interaction to using the To Object dropdown.
- Enter the interaction name in the Interaction Name field. The preview below the field will show the output in
snake_case. - Select Save. This will add the interaction to your chosen object in the schema draft.

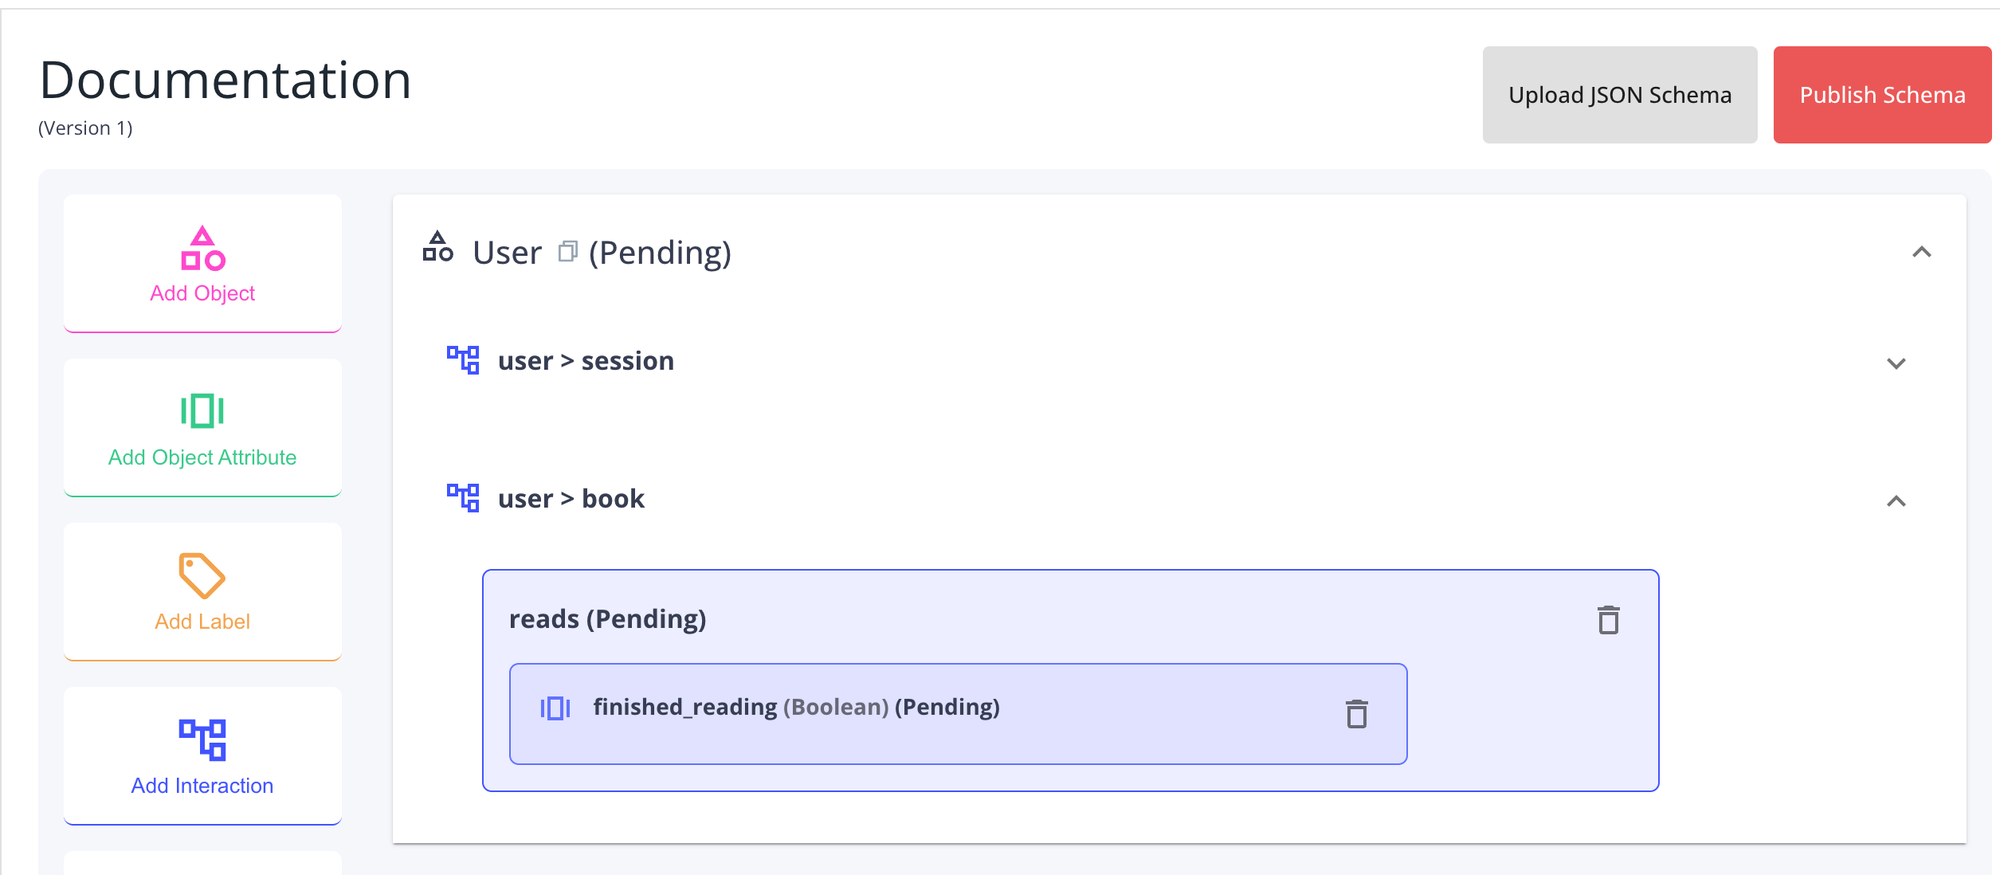
Adding an Attribute to an Object Interaction
Attributes enable you to add more details to the interaction between two objects. They are composed of a name and a type. Some types have more parameters available.
The types available are:
booleannumber(includes optional parameters forminv,maxv, andnum_slices)date(includes an optional parameter formin_date)category(includes required options for category names)
To create an interaction attribute:
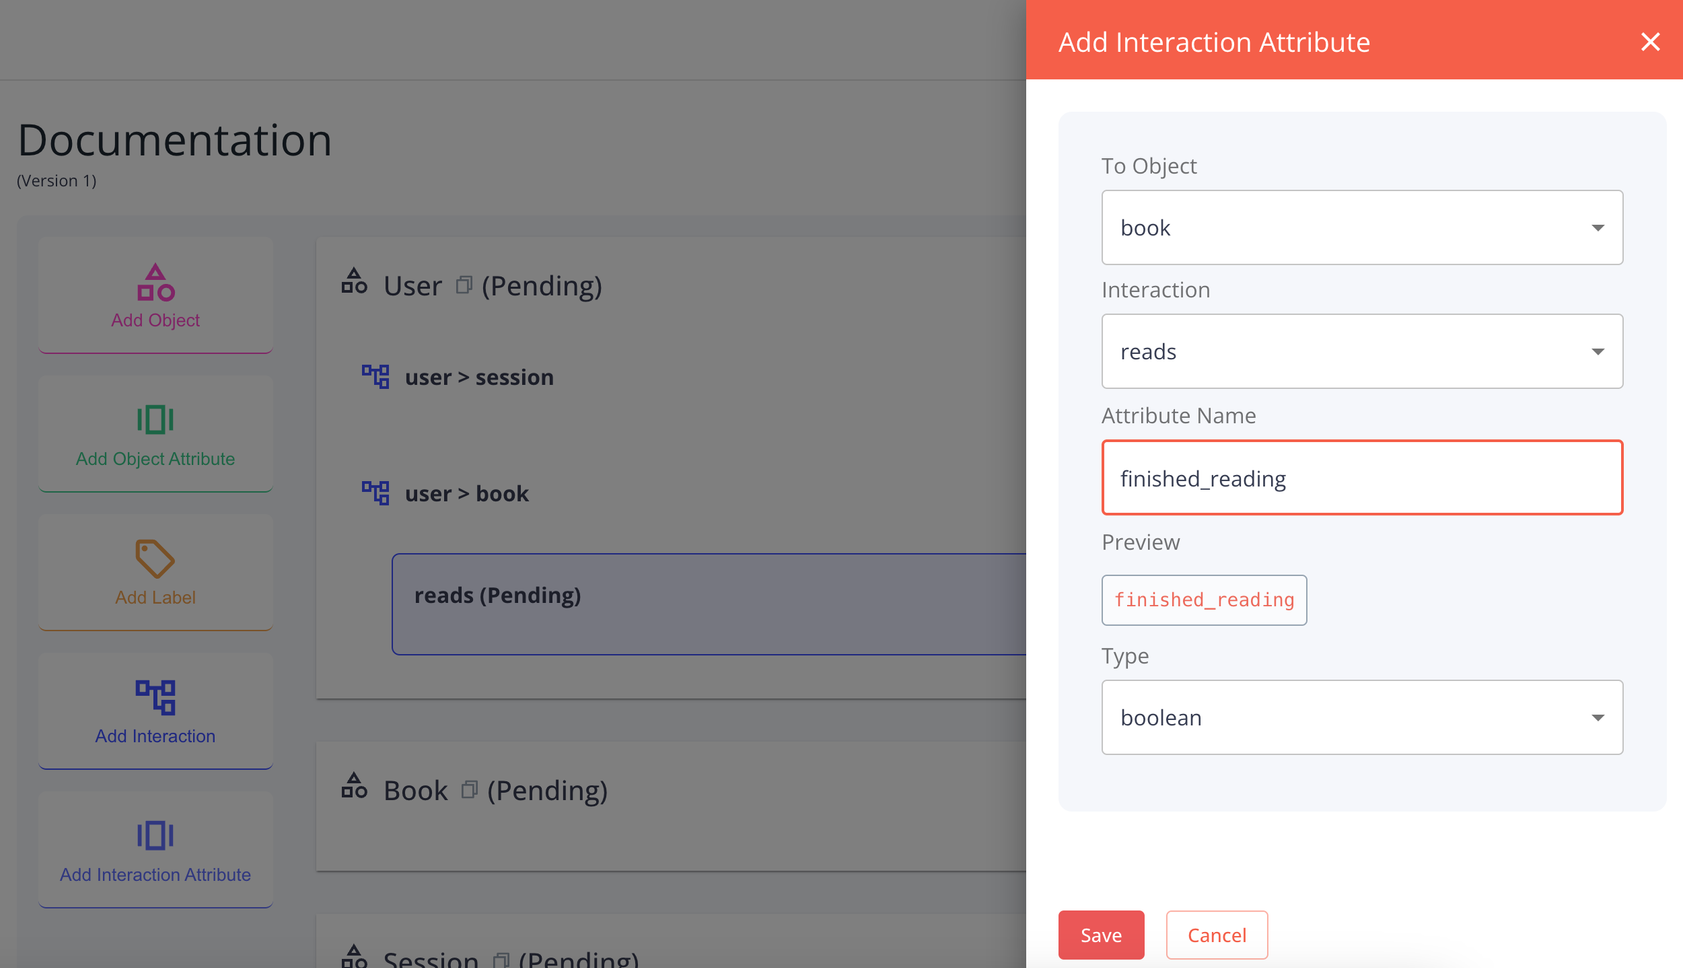
- Select Add Interaction Attribute. The corresponding menu will expand.
- Select the target object.
- Select the target interaction.
- Enter the attribute name in the Attribute Name field. The preview below the field will show the output in
snake_case. - Select the attribute type from the Type dropdown.
- Select Save.
Once the new interaction attribute is created, it will appear under the interaction.
Publishing Your Schema
Once all objects, labels, attributes, and interactions are added. Select Publish.
This action will consolidate all of your pending changes into our backend. You will now be able to target your new active schema with any new algorithm projects you create.
You can make future changes to this schema from the Data Schema page. The version number will increase with every publication. Any changes to the draft will not affect any active algorithm projects.
You’re ready to begin your project.
If you have a JSON schema already created, you can upload it directly without having to manually repeat each item. Click here to learn how to build a JSON schema.